Chapel Field Christian Schools
In this unit we will be programming Arduino Uno devices using the Arduino IDE. IDE stands for Integrated Development Environment. Although you can program these devices using other tools, we will use the official tool. Once you've mastered it, you are welcome to use other tools that you might prefer.
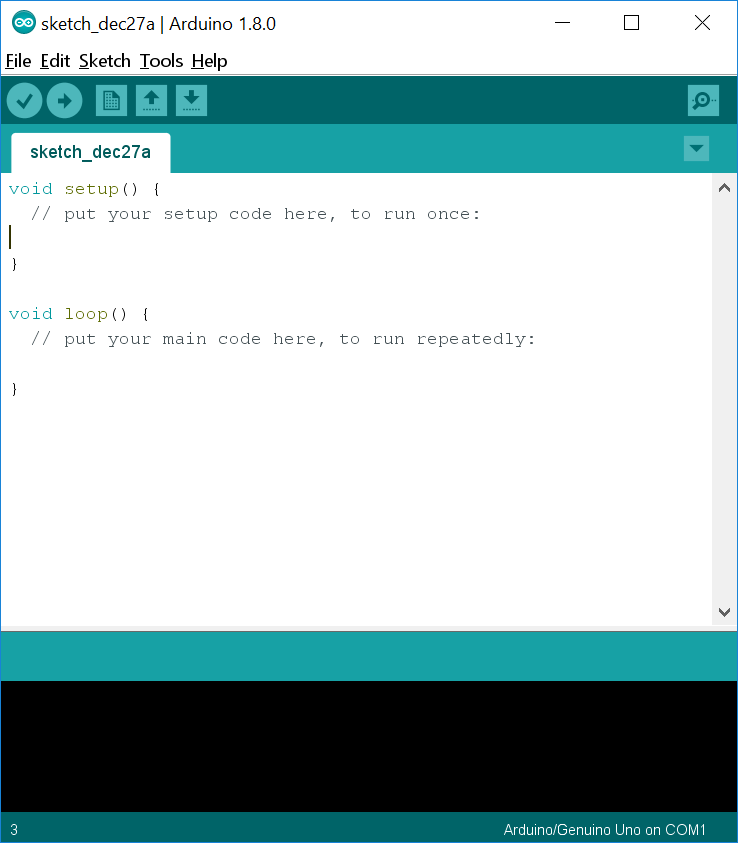
If you haven’t already done so, install the Arduino IDE from the Windows Store. You can use the default options. Once you've installed it, open it. You should see something like this:
This is the basic skeleton for an Arduino program. As you can see, there are two sections. The first is for code you only want to run when the Arduino boots up. The second is for the code you want to run as long as the Arduino is powered on.
Raise your hand and have Mr. Olinda verify this checkpoint.
Unpack your Arduino Uno and your USB-A to USB-B cable. Once you have them, quit the Arduino IDE and connect the Arduino Uno to your computer using the cable. You should see a small green LED blink several times when you plug it in, and you'll see an orange LED as well.
Open the Arduino IDE and go to the Tools menu. Hover your mouse over the Ports submenu and then choose the COM port that shows the Arduino Uno attached to it.
Raise your hand and have Mr. Olinda verify this checkpoint.
Open Git Bash and navigate to your OneDrive folder. Then use git init to create a repository called cspProjects. This is where your work for the second semester should be stored. Create an arduino directory in that folder.
Go to the File menu and open the editor preferences (you can also get here by pressing Ctrl+Comma). First, change the default location of your sketchbook to your new cspProjects/arduino folder. Then enable code folding and line numbers.
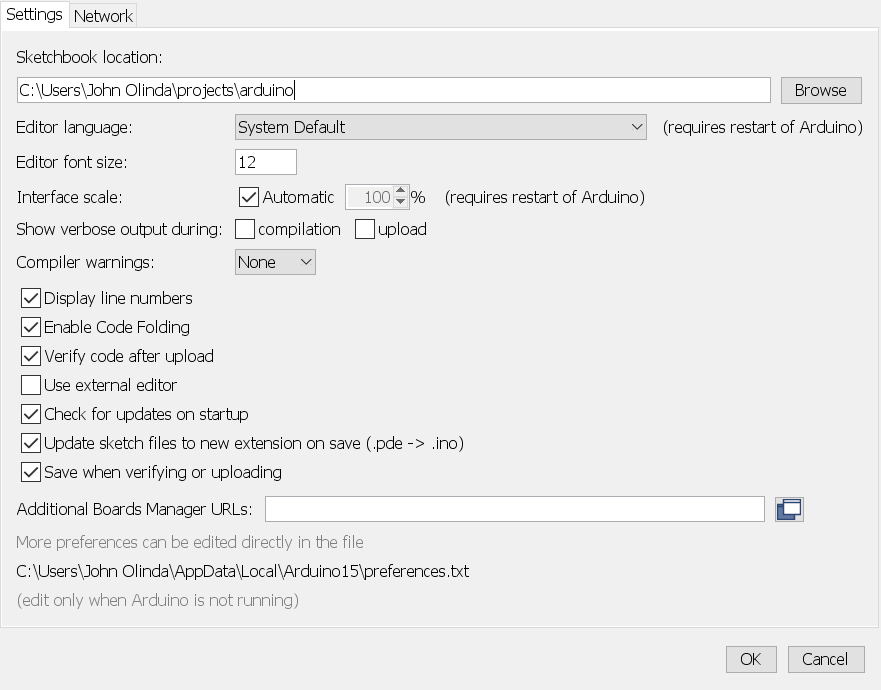
Once you've done this, press OK. Quit the Arduino IDE and reopen it.
Raise your hand and have Mr. Olinda verify this checkpoint.
You should have the empty program on your screen. Go ahead and compile it by pressing the check symbol (or Ctrl+R) which will make sure your program is free of errors. This doesn't mean your program does anything, it just means that it doesn't have syntax errors. You should get a message similar to the following (I compiled and uploaded my program to a MEGA 2560, not an Uno) when it finishes in the console at the bottom of the window:
Sketch uses 656 bytes (0%) of program storage space. Maximum is 53952 bytes. Global variables use 9 bytes (0%) of dynamic memory, leaving 8183 bytes for local variables. Maximum is 8192 bytes.This just tells you how much of the Arduino's storage your program uses as well as how much memory it will use. Now, upload it to your Arduino. The Arduino won't do anything since it's an empty program, but you should get a simple message in the console telling you what happened:
Sketch uses 656 bytes (0%) of program storage space. Maximum is 253952 bytes. Global variables use 9 bytes (0%) of dynamic memory, leaving 8183 bytes for local variables. Maximum is 8192 bytes.It's basically the same. However, if you have any errors, those will also appear here. Go back to your settings and check the boxes for compilation and upload after the phrase: "Show verbose output during:" and repeat this checkpoint to see more detail about what's going on in the background.
Finally, save your program as "bareMinimum" in your Arduino project folder. Then git add and git commit. Make sure your commit message follows the Seven Rules.
Raise your hand and have Mr. Olinda verify this checkpoint.
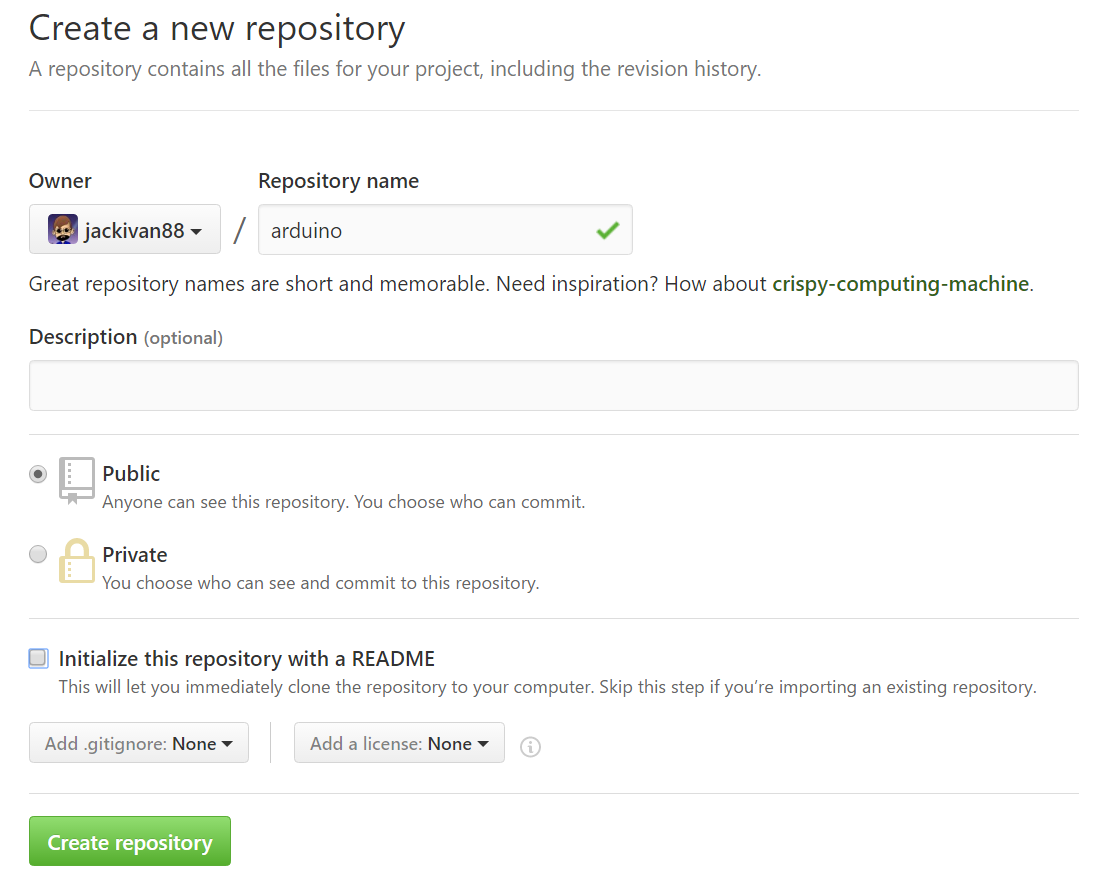
Now you need to link your local Git repository to a remote repository on GitHub. Go to GitHub and create a new repository called "cspProjects". Make sure your capitalization matches mine.
Then add this new remote repository to your local repository so that you can save your work to GitHub. Copy the link from the Clone or download button. Then, type the following command, replacing “link” with the link to your repo:
git remote add origin link
Then type:
git push -u origin master
You should get a confirmation message, but if you get an error, be sure to read the instructions in the error message. You must understand that Git repositories can exist locally and remotely, and can be both at the same time. Almost all repositories in this class will be both local and remote since it allows you to have a backup of your work, but you can create a local repository which exists only on your computer if you want.
Raise your hand and have Mr. Olinda verify this checkpoint.