Chapel Field Christian Schools
Your Arduino has a serial connection for communicating with your computer or with other devices. Usually you'll use the built-in serial port in the USB port, but you can also connect to pins 0 and 1 to communicate over serial. Be careful when doing this since using the wrong voltages can damage your Arduino. During this lesson I link to several more detailed explanations of certain functions. If you're confused about what they do, try reading those before you ask a question.
Get your supplies and take out only the Arduino and the USB cable. Connect your Arduino to your laptop, open the Arduino IDE, and make sure the correct port is selected.
Have Mr. Olinda verify this checkpoint before moving on.
Create a new Arduino program from the file menu and write the code to make pin 13 blink on and off with a 1 second delay. Upload the program to make sure it works and then save the program as serialBlink in your ~/../cspProjects/arduino/ directory. Then add and commit it to version control using a proper commit message.
Have Mr. Olinda verify this checkpoint before moving on.
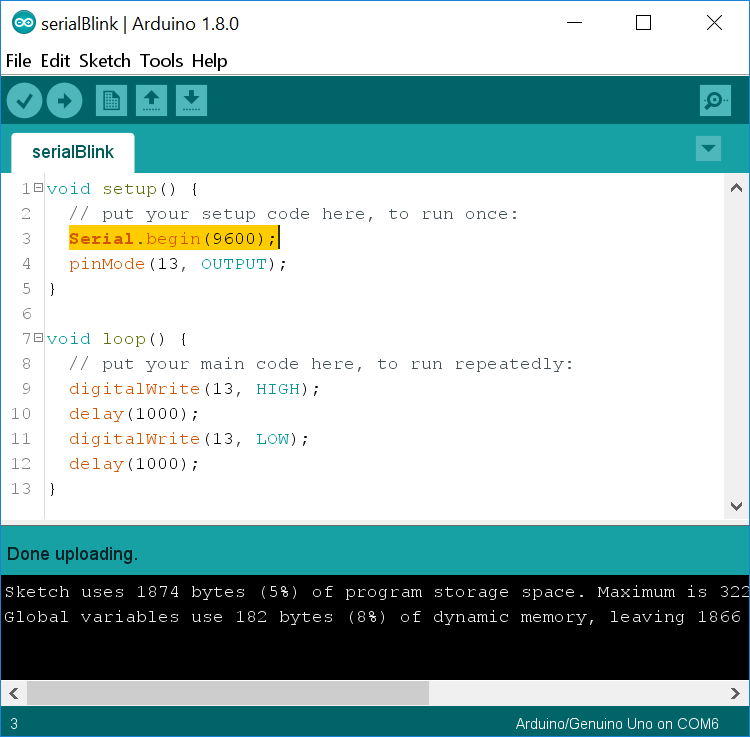
Now you need to add the following statement to the void setup() function:
Serial.begin(9600);
This activates the serial connection in your USB port and sets the baud rate to 9,600. This link provides a more detailed explanation of baud rates, but it basically means the number of signals that can be sent per second.
Add the following code to the void loop() function right after the code that turns the LED on:
Serial.println("On");Then add the following code to the void loop() function right after the code that turns the LED off:
Serial.println("Off");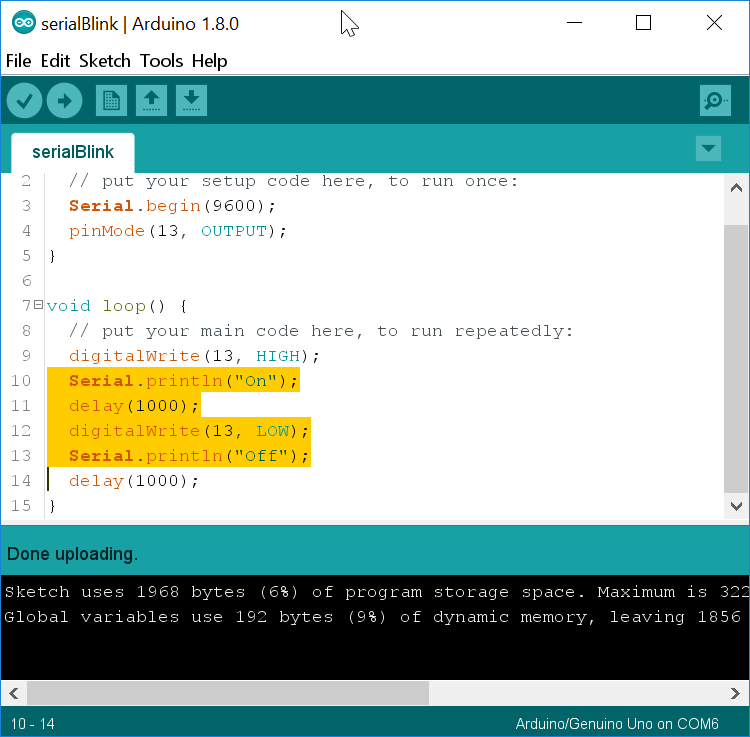
Upload the program to your Arduino and press the magnifying glass icon in the upper right corner to open your serial monitor. You should start to see a series of messages appear.
If you do, then save your program, add, and commit. If not, go back and review the instructions to make sure you've done the steps correctly.
Have Mr. Olinda verify this checkpoint before moving on.
Use the Serial.println() functions to make your Arduino say something nice to the user when it first boots up. If it works, then save, add, and commit.
Have Mr. Olinda verify this checkpoint before moving on.
Change all the Serial.println() functions to Serial.print() functions and see what happens in the serial monitor when you upload your program. What is the difference between println and print?
Have Mr. Olinda verify this checkpoint before moving on.
Go ahead and change the Serial.print() functions back to Serial.println(). Now you're going to modify your program to turn the light on and off in response to commands you send via the serial monitor. First, add the following code underneath your friendly message:
Serial.println("Send 'On' to turn on the LED.");
Serial.println("Send 'Off' to turn off the LED.");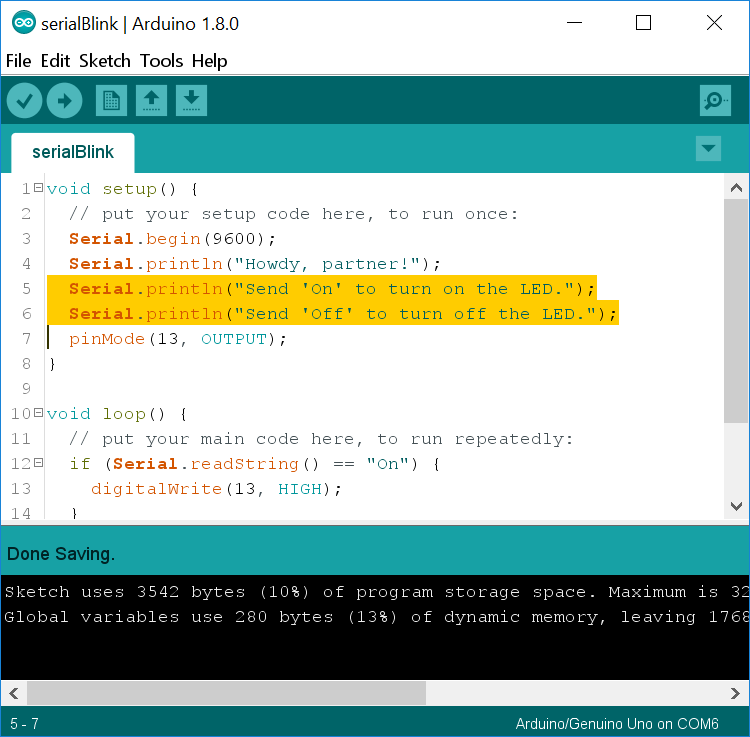
Don't change anything else yet. Open your serial monitor and upload the program. As soon as the program uploads you should see something like this:
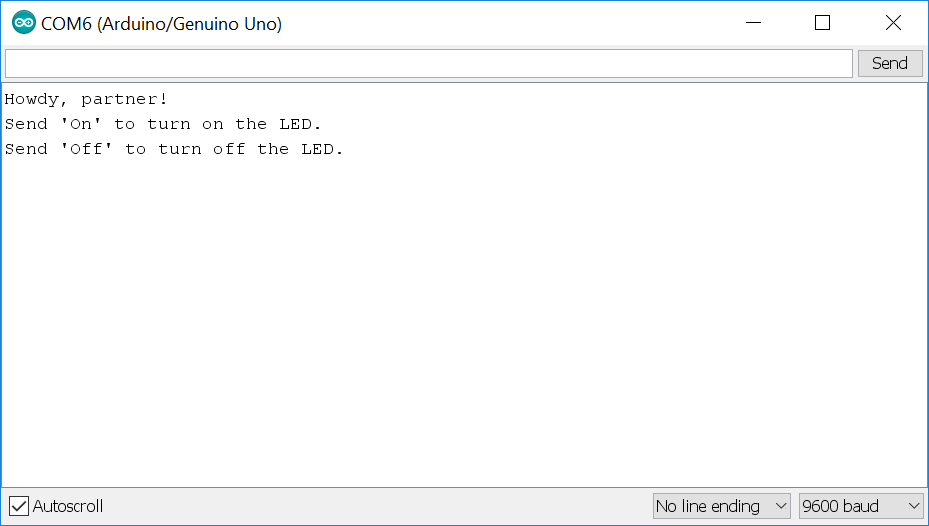
If you see this, go ahead and save, add, and commit.
Have Mr. Olinda verify this checkpoint before moving on.
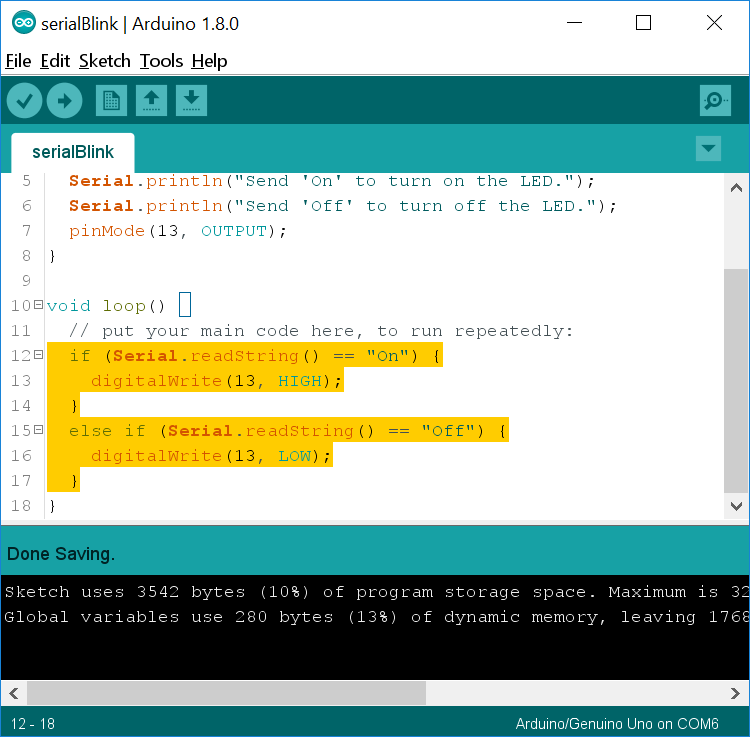
Now you're going to create an if / else block in your void loop() function that will control the lights. An if / else block tells the Arduino to do one of the things in the block if certain conditions are met. If they're not met, the Arduino will simply loop around and try again. Add the following lines to your code:
if (Serial.readString() == "On") {
  digitalWrite(13, HIGH);
}
else if (Serial.readString() == "Off") {
  digitalWrite(13, LOW);
}
The Serial.readString() function waits for you to send something from the computer to the Arduino via the serial connection and then reads it as if it is a group of text characters. If you were sending only integers or floating point values, you would use a different function. Open your serial monitor and then upload the code. You should now be able to type "On" or "Off" into the serial monitor to turn the light on and off. Go ahead and save, add, and commit your code. However, you'll notice that it doesn't respond. This is because we're directly reading the serial buffer, which is emptied every second. Sometimes it is emptied before the program has a chance to read it or it contains extra, invisible characters. We're going to fix this later.
Have Mr. Olinda verify this checkpoint before moving on.
Let's add some feedback for the user other than the light. Even though the light provides feedback, it's possible that the light could be defective. Having another way of knowing whether your code is working helps you to find problems with your software and hardware. I want you to add Serial.println() functions in your if / else block to tell you what the Arduino is doing in response to your commands.
Have Mr. Olinda verify this checkpoint before moving on.
Up until now, the Arduino has been unreliable in its response to our commands. We're going to fix that. At the beginning of your void loop() function, add the following:
if (Serial.available() > 0) {
  String command;
  command = Serial.readString();
  command.trim();

}
You'll notice that there is a blank line. In this blank line, cut and paste your if / else block and run Auto Format. Now you have if statements nested inside another if statement. The Serial.available() function checks to see if there is anything in the serial buffer. Once there is, it creates a string variable called command and then stores whatever is in the serial buffer as command. `command.trim()` gets rid of any extra characters that might appear to the computer even though they're not visible to the user.
Now, find the functions that turn the light on and off and change them so that they are triggered based on the command variable, not directly by the serial buffer.
Then add this command underneath your Serial.begin() function in your void setup() function:
Serial.setTimeout(10);This will make your Arduino scan the serial buffer every ten milliseconds instead of once a second. Now test it and see if it does what you tell it to reliably. If it works, save, add, and commit your code.
If you want an extra challenge, see if you can get rid of the nested block. In other words, see if you can change the code so that you don't have an if inside another if. Also, see if you can add an else that responds to the user if they type anything except "On" or "Off" to help them figure out what to do.
Have Mr. Olinda verify this checkpoint before moving on.
Go back and add comments to each line of code explaining what it does. Then save, add, commit, and push your code.
Have Mr. Olinda verify this checkpoint before moving on.